Bit Abode
Introduction
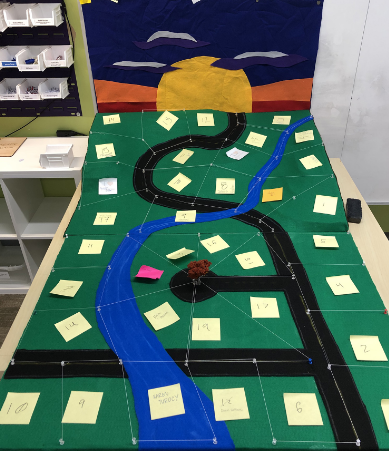
Recently, as part of the University of Pittsburgh Swanson School of Engineering course ENGR 0716 The Art of Making: An Introduction to Hands-On System Design and Engineering, my fellow students and I were asked to construct a miniature town from foam core. For the basic deliverable, each student had to construct a house with two different styles of roof, a cylinder, and a solar panel, with everything affixed using Velcro. Each student was also instructed to claim a plot of land on the felt landscape shown below.
Aside from the basic model, “copious bonus credit” would be awarded for making additional structures either from a list we were given or of our own design. From the list, I chose to give my house windows and two doors with rounded tops. I also added a movable satellite dish to the roof of my house and a wind turbine on the adjacent plot of land. One final design I incorporated from the pre-determined list was a “leveler” for my wind turbine since it was situated on a sloping plot of land. For my own designs, I added RGB lighting to my house with red, green, and blue LEDs as well as motorized my wind turbine using littleBits electronics (specifically the littleBits DC Motor and Wire modules). Furthermore, I decided my RGB lighting and wind turbine would be internet-enabled and controllable from my phone via a web app. Because this project combines littleBits components and a foam core house, the name Bit Abode came to fruition.
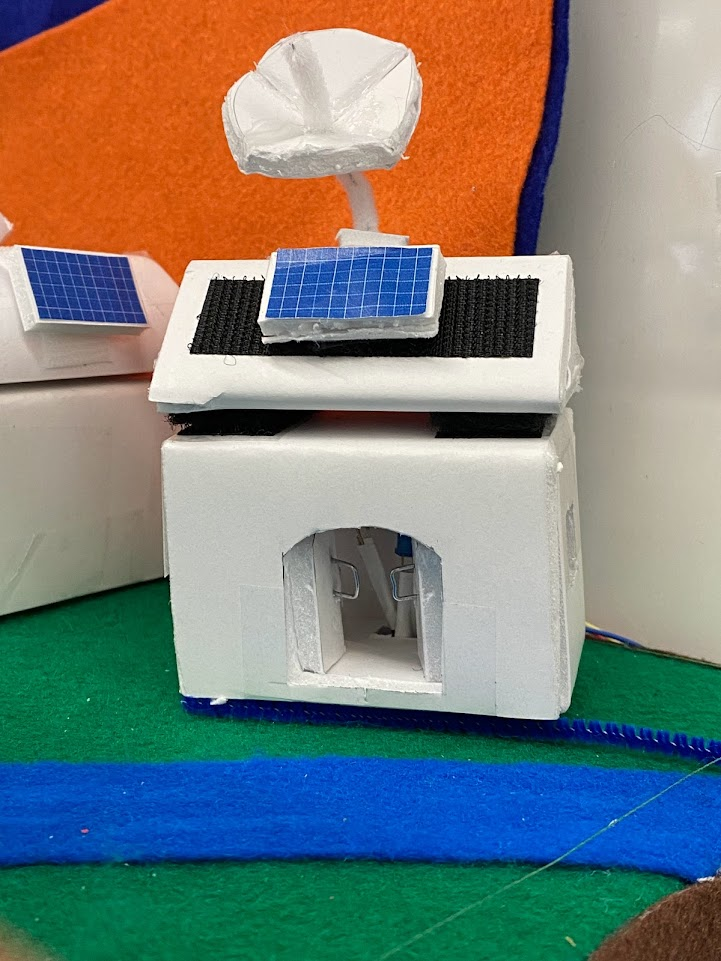
Miniature house made from foam core. Has a moveable satallite dish, hinging doors with rounded tops, windows, and lights.
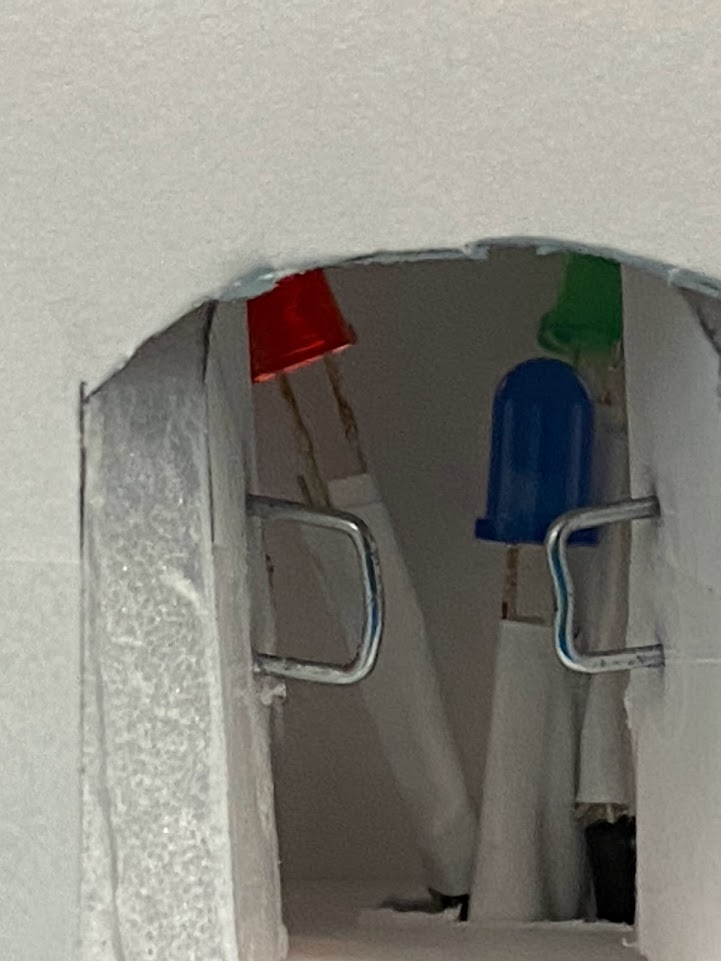
Red, green, and blue LED lighting in house.
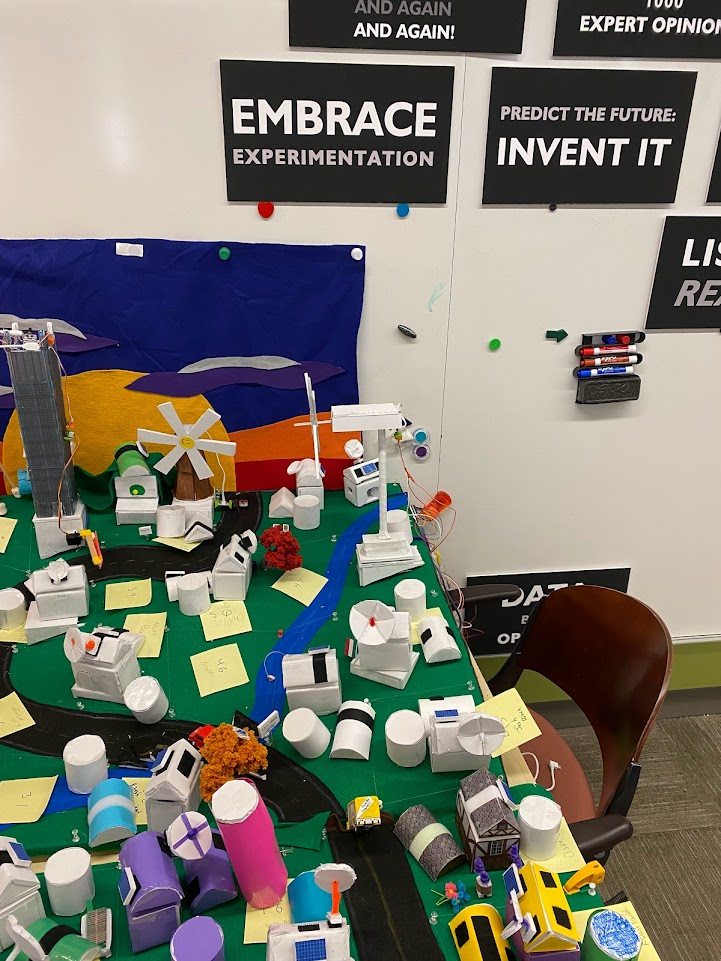
My combine plot of "land" is shown in the far rear, right corner with completed structures
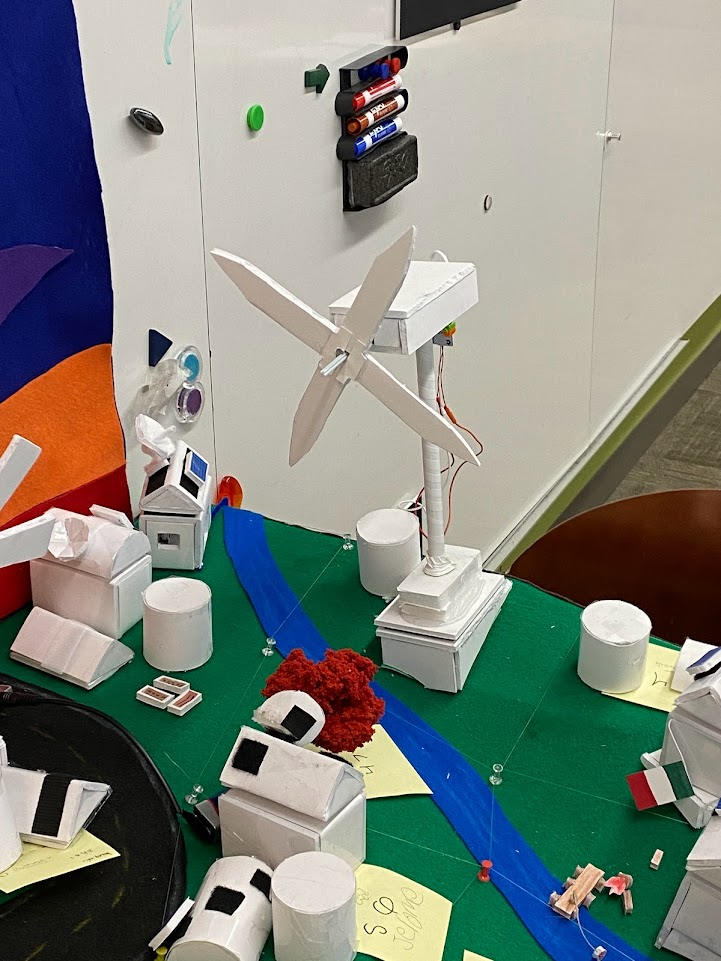
Windmill with leveler
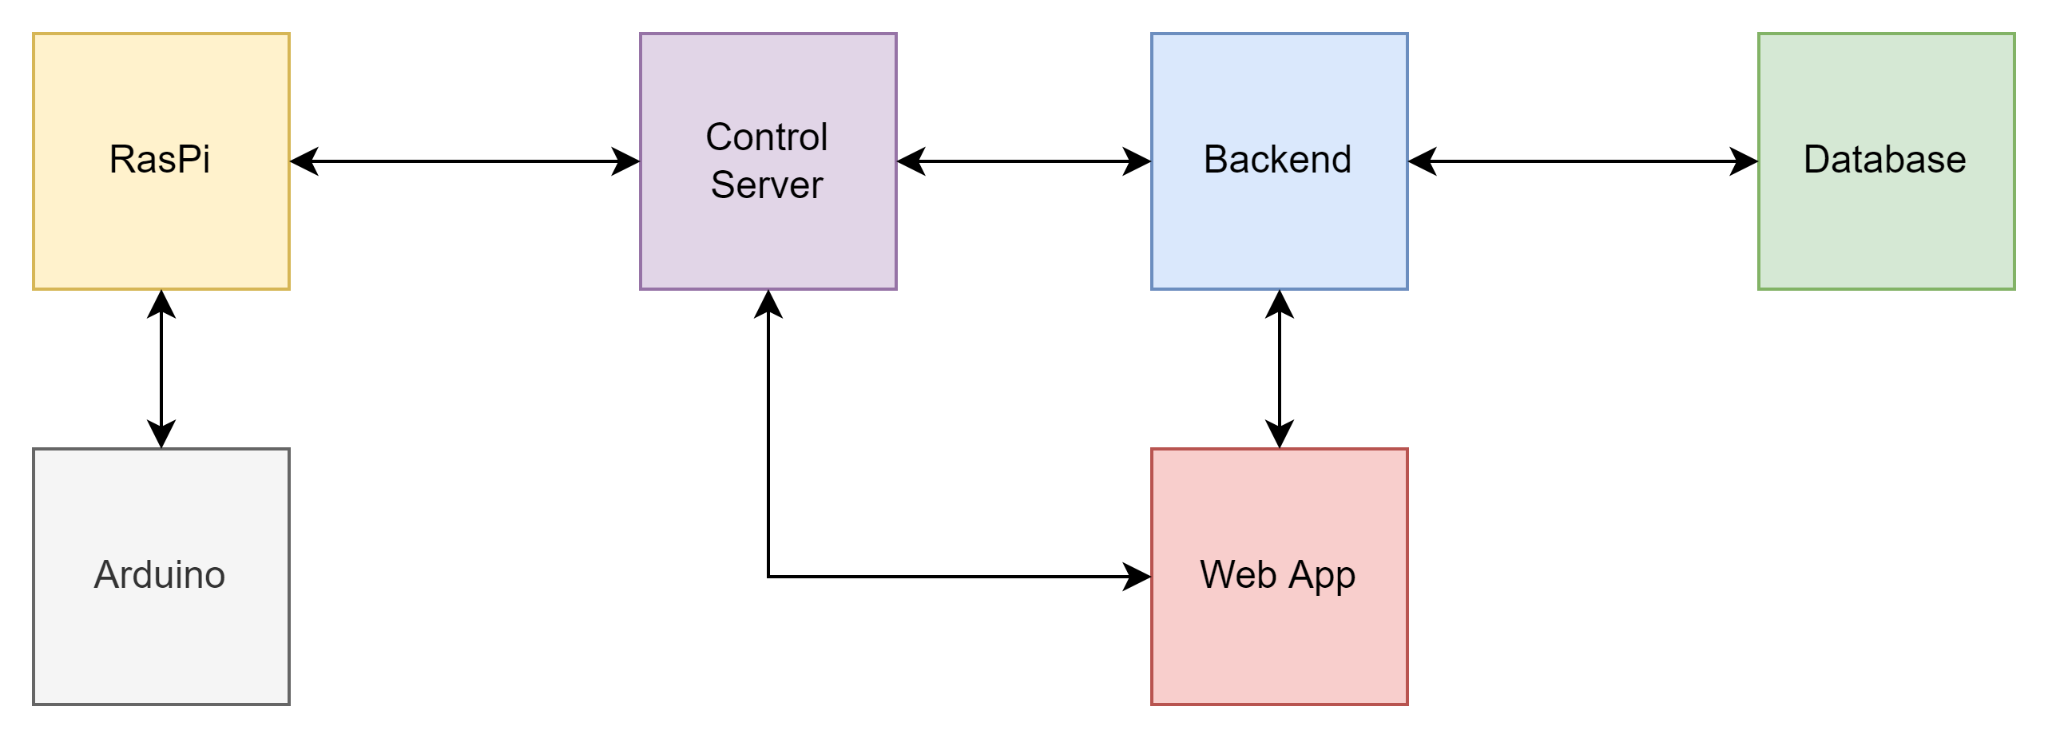
To accomplish this, I used an Arduino Uno for I/O and Raspberry Pi Zero W to connect to a control server and relay commands to the Arduino. The control server was written in Python and used WebSockets for near-realtime communication. The web app used to send commands from my phone was written in React and used a NodeJS backend for API calls to a MongoDB database. Each of these components is explained in further detail below.
Arduino
Each device connected to the Arduino Uno is identified by the pin it is connected to. The Arduino receives commands to control these devices from the Raspberry Pi via serial over its USB port. Each serial transmission is composed of three bytes. The first byte of each serial transmission specifies whether the command is digital or analog, the second byte specifies the pin number, and the third byte is the actual value to write to the pin either using digitalWrite() or analogWrite().

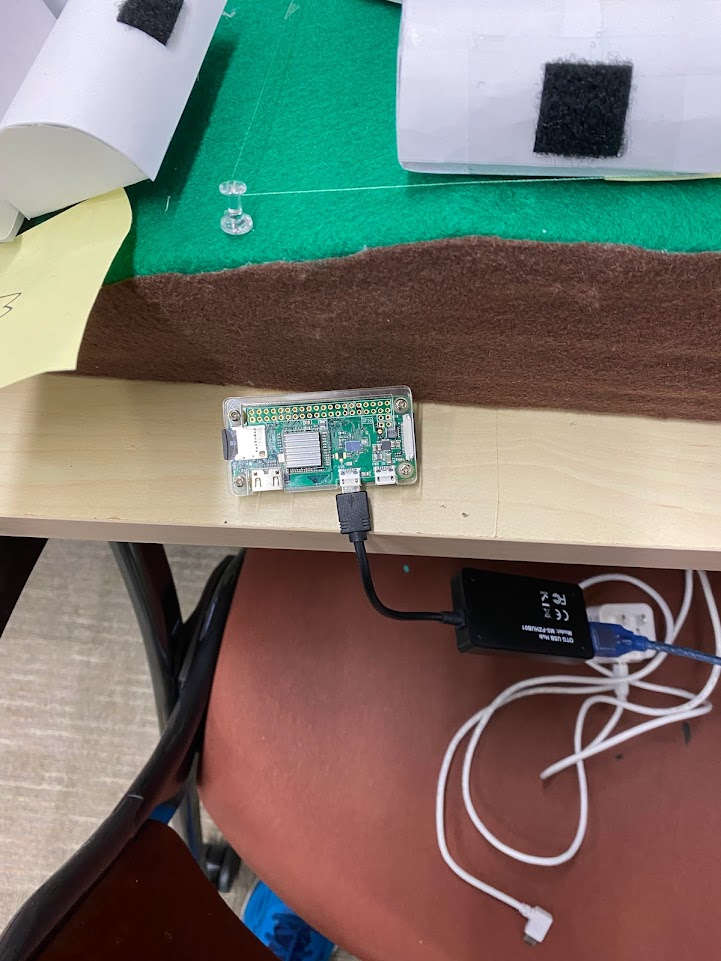
Raspberry Pi
The Raspberry Pi Zero W receives commands from the control server via WebSockets and relays the commands to the Arduino via serial over USB. On startup, the Raspberry Pi establishes a WebSocket connection with the control server, and registers a unique key with the backend and database. This key is then used by the web app to connect to the Raspberry Pi. Likewise, the Raspberry Pi also sends a message to the control server to update its status in the database. After the web app connects to the control server, the Raspberry Pi receives commands in the form of JSON messages from the web app, parses the values into a series of bytes, and then transmits them via serial to the Arduino. The Raspberry Pi send a WebSocket message to the control server to update the corresponding device’s status in the database.
Control Server
The control relays commands between the web app and the Raspberry Pi. It also makes requests to the backend server to update the state of the Raspberry Pi and devices controlled by the Arduino in the database.
Web App and Backend
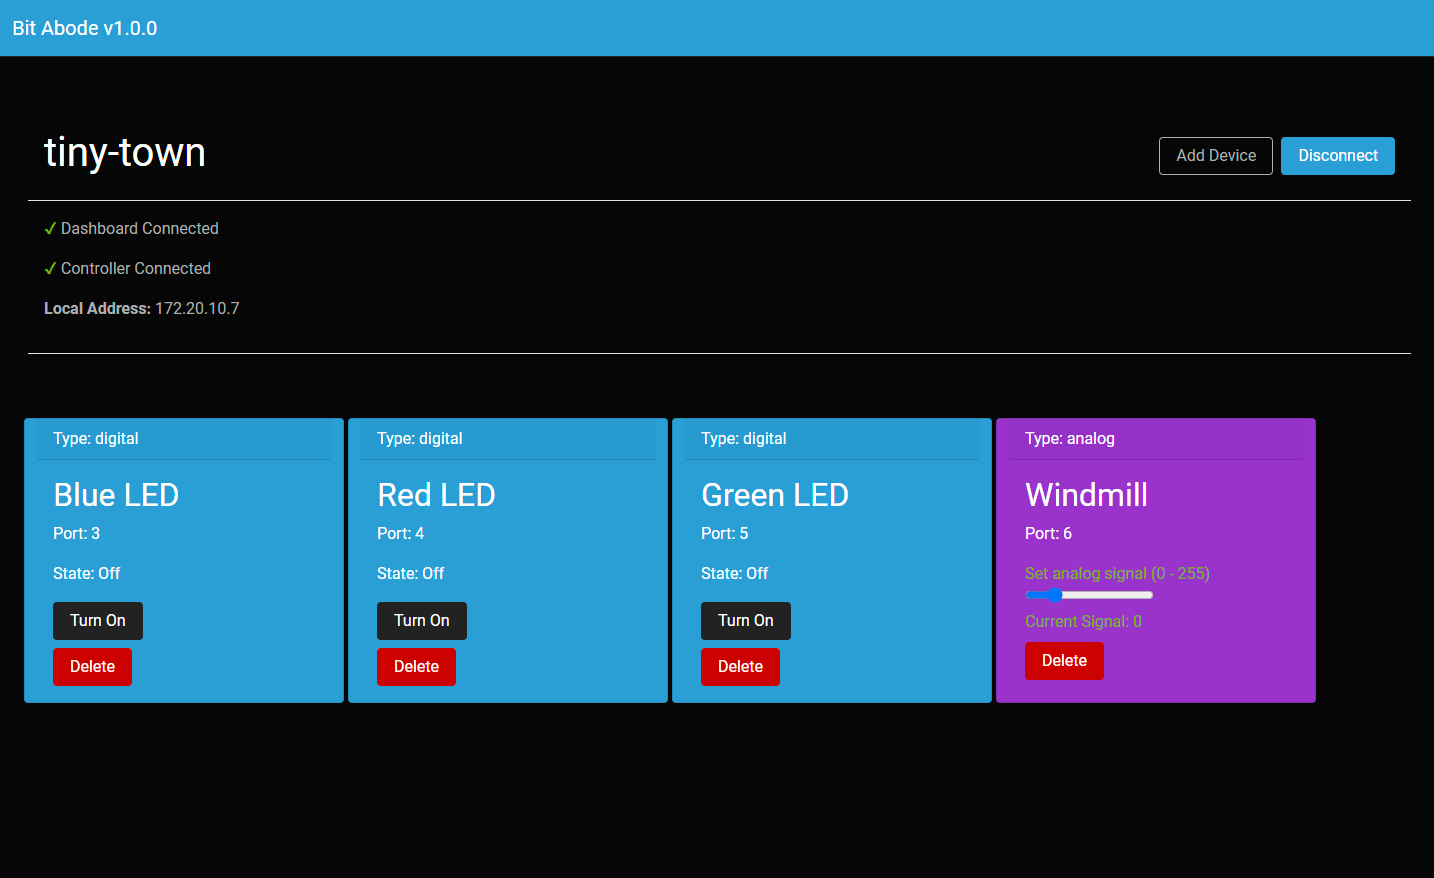
The web app and backend server are both written in JavaScript. The web app frontend uses React and the backend uses NodeJS. The frontend provides a basic dashboard to control the Raspberry Pi and Arduino with options for sending both digital (On/Off) and analog commands for given devices. The backend provides an API that allows the web app frontend and control server to communicate with the database. The frontend web app uses this API to obtain the necessary key to connect to a given Raspberry Pi via the WebSocket control server and display the status of devices controlled by the Arduino on the dashboard.
View the code for this project code on Github!